Installation of DEMO or Registered Copy of the software.
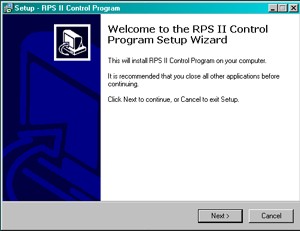
| 1. After downloading your program copy from the internet, you will need to run the SETUP.EXE program to begin the installation process. This is the initial screen. Select NEXT. |
|
| |
|
| 2. You need to agree to the License Agreement for the software and select NEXT. |
|
| |
|
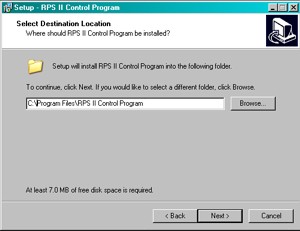
| 3. The program will select a default directory for installation. You can change this to a directory of your choosing if desired. Click NEXT when ready. |
|
| |
|
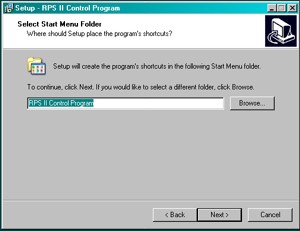
| 4. Select the Start Menu Folder Name and click NEXT. |
|
| |
|
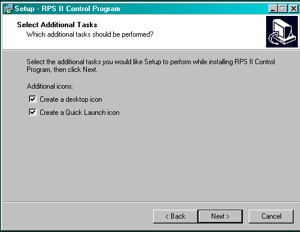
| 5. If you would like to have a desktop icon or quick launch icon, check off the boxes. Select NEXT when ready. |
|
| |
|
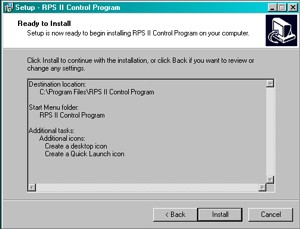
| 6. The program summarizes all the installation information. If everything looks ok, select INSTALL. |
|
| |
|
| 7. If a successful installation is made, you will have the option of starting the RPS Software immediately. Click FINISHED. |
|
| |
|
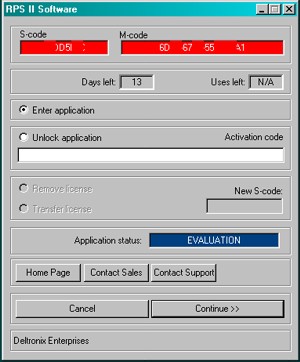
| 8. When started, you will first see the DEMO interface for the program. If will keep track of the 14 day DEMO period. Select CONTINUE. |
|
| |
|
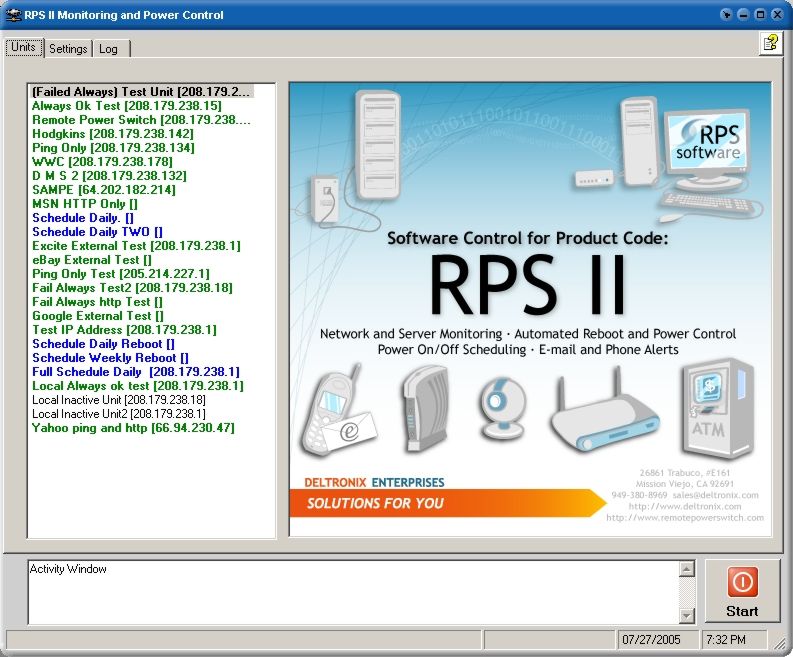
| 9. The Main RPS Software program will start. This screen shows a 25 unit configuration option. The DEMO version will allow you to configure 2 units for evaluation. |
|
| |
|
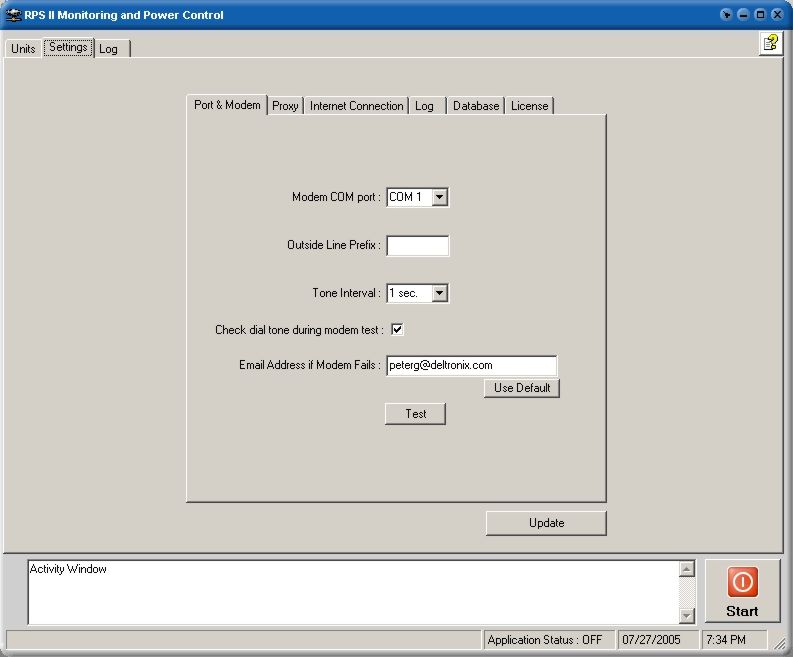
| 10. The first thing you will need to do is click the SETTINGS Window and begin the configuration by entering the data for your modem. When clicked, the Question Mark ? in the upper right corner of the screen will open a window to the ONLINE help system to help guide you through the program options. You may also see an online step-by-step configuration of the program by clicking here ! |
|