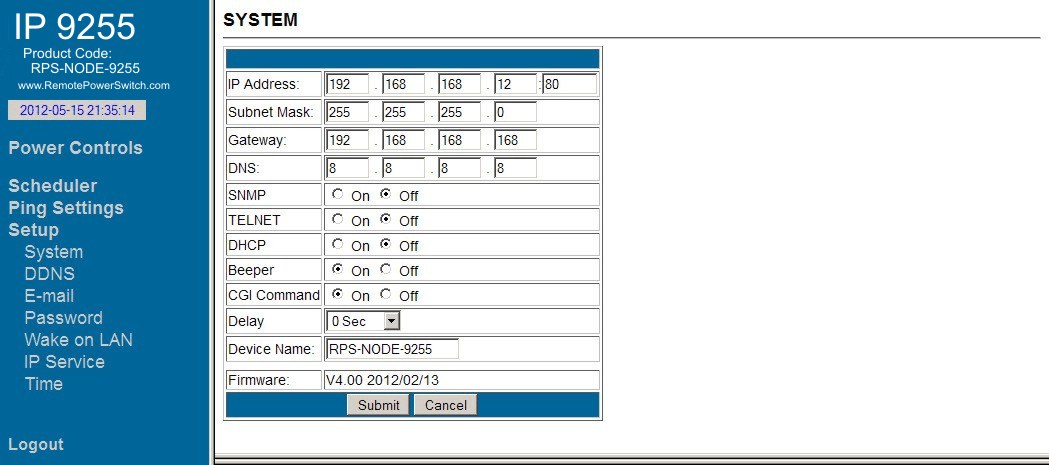
System Configuration Menu
 |
|
| The SETUP link will allow you to configure the network properties of your remote power switch unit. You can configure the IP Address, Subnet Mask, Default Gateway (Usually your routers IP Address ) and DNS. If you enable DHCP, the RPS-NODE-9255 will attempt too receive its network configuration from your DHCP server. You can also enable/disable the BEEP sound the unit issues when acknowledging a command. SNMP and Telnet may also be enabled from this screen. The DelaySwitch option will initiate an automatic delay before completion of any on/off event in the Power Control section. The standard port the unit uses for its internal webserver is port 80. Once the port is changed, you will have to access the RPS-NODE-9255 unit from your web browser by appending the port number to the address line. If you were to configure the unit for access on port 8181, your web browser address line would reflect https://XXX.XXX.XXX.XXX:8181 (https://YourIPaddress followed by a Colon and then 8181) IP Address: IP Address of the device followed by the Port Number typically 80. |
|
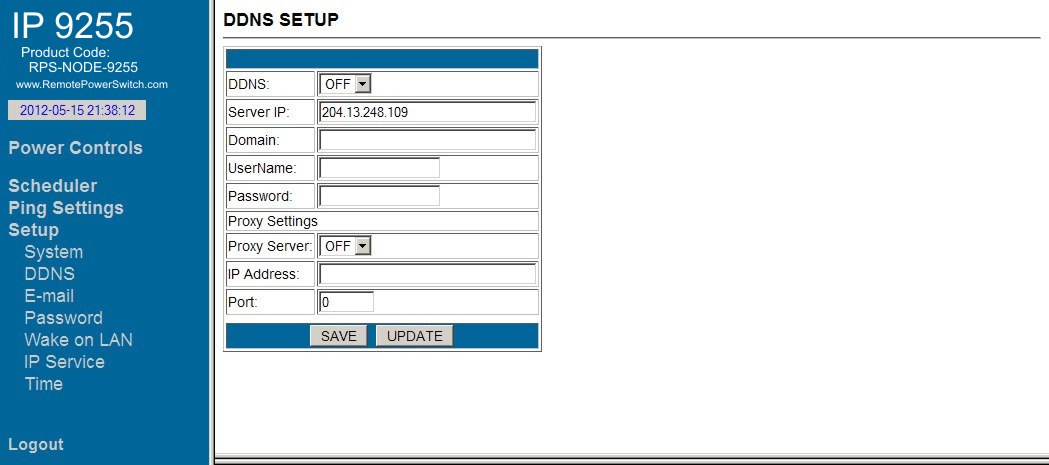
DDNS Configuration
 |
|
| The DDNS link allows you to configure a Dynamic Domain Name Server so you can access your RPS device using a domain name instead of a numeric IP address. We recommend using www.dyndns.com which will help you accomplish this configuration. First apply for a domain name at www.dyndns.com . Set the domain user name, password, DDNS Server IP and your domain name ( example: abcdefg.dyndns.com ). The RPS-NODE-9255 will send information to the dyndns.com service that will contain the IP address, which will be ‘matched’ to your domain name. So instead of accessing your remote power switch in your web browser with an ip address ( https://192.168.10.100) you can access the device with a domain name ( https://abcdefg.dnydns.com ). If you need to append a port to the address line, add a colon followed by the port number ( https://abcdefg.dnydns.com:8181). You must first SAVE the information by clicking the SAVE BUTTON. Then select the UPDATE NOW button to forward your configuration to the dyndns.com service. If necessary, you can also configure a proxy server on this page. Enter the IP Address, Proxy Port, Enable the proxy and select the SAVE BUTTON to update the software. DDNS: When using DDNS make sure that it is enabled.
|
|
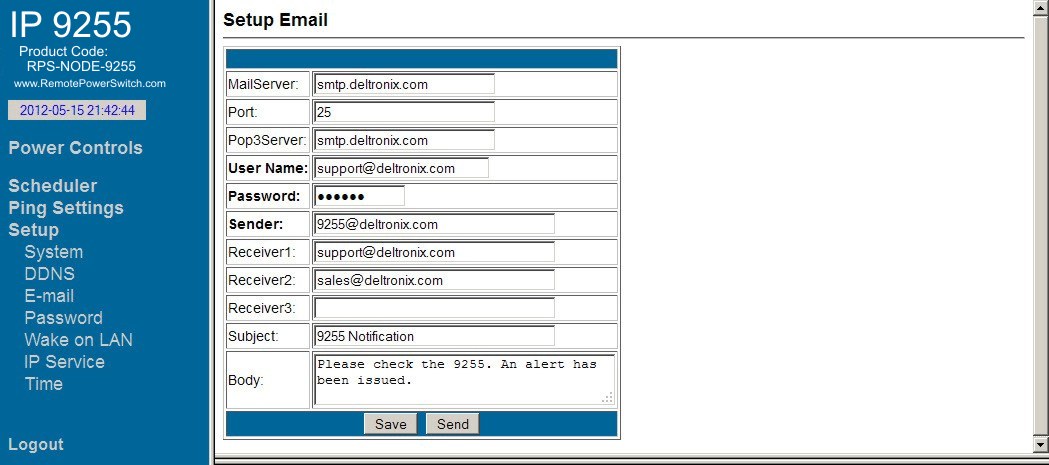
Email Setup
 |
|
| Mail Server: Outgoing Mail Server. Please make sure the server is an available mail server. Port used for sending mail typically 25 or 587. Pop3Server: Incoming Mail Server. IP address from your ISP for sending E-mail when RPS-NODE-9255 is on the Internet. Please also set the DNS of your ISP in the system configuration menu or input the IP address of the mail server. Password: the password of this mailbox must be 8 characters and only contain a-z, A-Z and 0-9. This is critical for proper operation. Sender: Fill in the name of sending email address. The Mail Server must support SMTP and these fields must be filled in correctly. Receivers: no longer than 50 letters. Subject: the subject of the mail no more than 50 letters. Mail Body: please type the content of the mail here, it cannot be left empty. After you have finished all of the above settings, click “SAVE“and your settings will be saved. Click Send to initiate a test email. Note that the RPS-NODE-9255 may not be compatible with all mail server architecture. If a problem develops, please contact support@deltronix.com for additional help. |
|
Previous | Next |
Power Control by Telephone