Components | Installation | Features | Web Interface | Auto-Ping Reboot/Email | Router Config Examples
Instructions Page 1 2 3 4 5 6 7 Home
| Dynamic Domain Name Service Setup |
 |
|
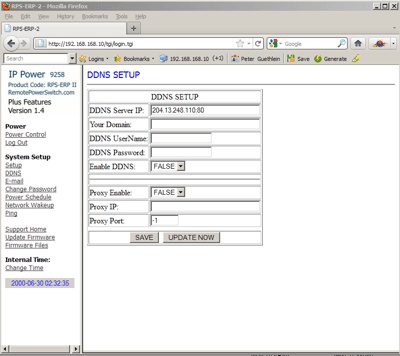
The DDNS link allows you to configure a Dynamic Domain Name Server so you can access your RPS-ERP II using a domain name instead of a numeric IP address. Using a service such as www.dyndns.com will help you accomplish this configuration. First apply for a domain name at www.dyndns.com . Set the domain user name, password, DDNS Server IP and your domain name ( example: abcdefg.dyndns.com ). The RPS-ERP II will send information to the dyndns.com service that will contain the IP address, which will be ‘matched’ to your domain name. So instead of accessing your RPS-ERP II in your web browser with an ip address ( https://192.168.10.100) you can access the device with a domain name ( https://abcdefg.dnydns.com ). If you need to append a port to the address line, add a colon followed by the port number ( https://abcdefg.dnydns.com:8181). You must first SAVE the information by clicking the SAVE BUTTON. Then select the UPDATE NOW button to forward your configuration to the dyndns.com service. If necessary, you can also configure a proxy server on this page. Enter the IP Address, Proxy Port, Enable the proxy and select the SAVE BUTTON to update the software. |
| Power Scheduling |
 |
|
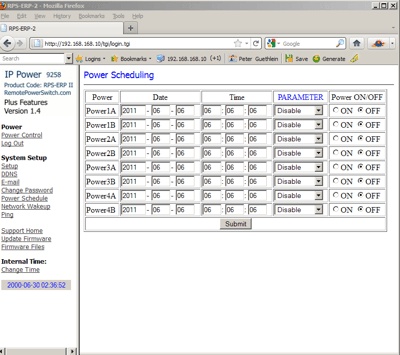
If you have the Tier 2 or Plus Software Version installed, the screen will show a Power Scheduling Option. (as shown above) This will allow you to power on/off the 4 individual power ports on the rear of the unit on a time schedule. Enter the date and time. The Parameter column allows you to select to 1) Disable the schedule 2) Have the operation occur Just Once 3) Have the operation occur Every Day 4) Occur every Work Day ( Monday – Friday) or just on the Weekend ( Saturday and Sunday). |
| Setup Date and Time |
 |
|
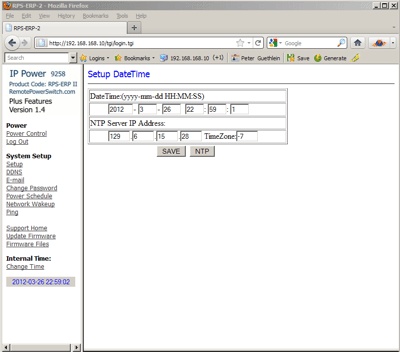
The Change Time Link will allow you to access the internal clock settings. |
| Network Wake on Lan Setup |
 |
|
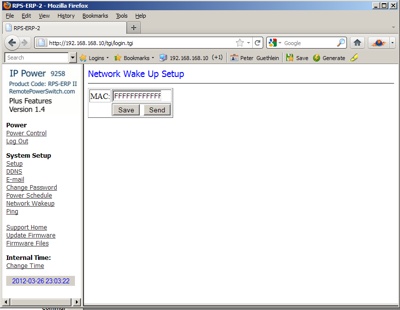
If you have the Tier 2 Software, The Network Wakeup link is available and allows issuing of a Wake On Lan command to the MAC address of the network card for a computer on your network. The computer’s main board must support the WOL function and have the WOL cable connected to your main board or network card. The feature and configuration is available on the RPS-ERP II but it is up to the user to make sure their computer is properly configured to use this feature. Enter the MAC address and select SEND to issue the WOL command from this screen. |
| Firmware Updates |
 |
|
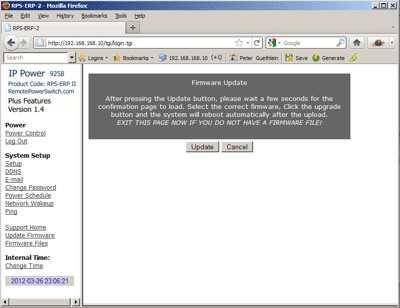
The Firmware Update Link allows you to update the software for operation of this web based remote power controller. You will have to download a firmware update from the firmware page at RemotePowerSwitch.com and apply the software through this link. After application of the update, you must wait one minute before you restart the RPS-ERP II unit. NOTICE: Before running the update, please make sure that the TCP port is set to 80 or the update may fail. Controlling the RPS-ERP II Power Status by http. The RPS-ERP II can be controlled directly by sending http commands with your user name and password embedded in the command line. https://admin:12345678@192.168.1.100/Set.cmd?CMD=SetPower&P60=1&P61=1&P62=1&P63=0 Username : RPS-ERP II username, default username is admin Password : RPS-ERP II password, default password is 12345678 192.168.1.100 the IP Address of RPS-ERP II These http commands control the RPS-ERP II at IP Address 192.168.1.100, user name is admin and password is 12345678. Note the username:password is separated by a colon. The Above SetPower Command will: Outlet Power 0 = off, 1 = on When the above order is sent, the RPS-ERP II will return the following message: To Get the Power Status of the outlets, send a GetPower Command: https://admin:1234567@ 192.168.1.100/Set.cmd?CMD=GetPower <html>P60=1,P61=1,P62=1,P63=0</html> will be returned. Even though the RPS-ERP II has only 4 active ports, the GetPower Command may return for ports 5 through 8 for a planned future model. If the http commands do not work, make sure your IE Browser is set to allow authenticated login and that any other firewalls or security software allows posting of the username:password on the http address line. If you get a ‘page not found’ error in IE, the username:password line is not being interpreted correctly ( and/or your IP Address is incorrect ). Try Mozilla/Firefox web browser if you are having problems with IE. To Control the Power Scheduling Function (Requires Tier 2 Firmware/Software) Schedule Control: You can use Http commands to have the RPS-ERP II perform a specific task at the specified time. The format of the commandline is: |